Publishing .NET Core Application in Docker Using DockerFile
In one of the earlier posts in the blog, I have showed you how to create and run a console application created in .NET Core from a docker container. Please refer the post here to know the details about it. In this post I am going to show you can publish an app created in the host machine to Docker container using a dockerfile.
A dockerfile is used by Docker to build automatically by reading the instructions inside it. The complete help file is available in Docker documentation site and you refer that for detailed information on the commands that can be used in the file.
You can go through my earlier posts on how to setup Docker for Windows Beta in your machine and how to troubleshoot issues you face while trying to get started with Docker in your Windows machine.
Also I will be using .NET Core for creating the console application and will be using the CLI commands and a normal editor for writing the source code for this example on a Windows 10 machine.
Creating Project
Let's create a new HelloWorld project in .NET Core using the following command.
dotnet new
The above command will create a boilerplate console application which will have a C# file named Program.cs and a project.json file which will have dependencies specified.

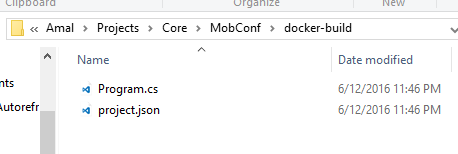
Program.cs
using System;
namespace ConsoleApplication
{
    public class Program
    {
        public static void Main(string[] args)
        {
            Console.WriteLine("Hello World!");
        }
    }
}
project.json
{
  "version": "1.0.0-*",
  "buildOptions": {
    "emitEntryPoint": true
  },
  "dependencies": {
    "Microsoft.NETCore.App": {
      "type": "platform",
      "version": "1.0.0-rc2-3002702"
    }
  },
  "frameworks": {
    "netcoreapp1.0": {
      "imports": "dnxcore50"
    }
  }
}
Compiling and Building the Application
We will now first use dotnet restore command to first restore the dependencies mentioned in the project.json file and then use dotnet build to compile the source code.

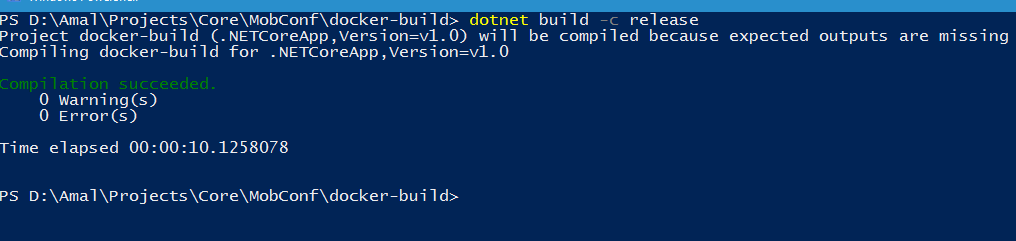
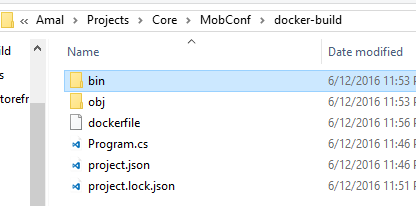
Here while building the project, I have used the -c switch to specify the build configuration mode and by mentioning the release mode the compiler will optimize the generated dlls. If you look at the folder now, you can see the the bin and debug folder under your root directory.
Let's now the run the application in our local machine using the dotnet run command. It will first check whether it's compiled or not and based on that it will do a compilation and will execute the program after that.
In our case you can see that, it has skipped the compilation and prints "Hello World" to the console which confirms the execution of our progam.

Creating dockerfile
As I said in the begining, Docker uses dockerfile to create an image based on the instructions in the file. So let's build one which will create an image for our console application.
The first statement will be
FROM microsoft/dotnet:1.0.0-rc2-core
The above command is telling Docker that the image that is going to be built is based on the base image microsoft/dotnet image that is having the version 1.0.0-rc2-core.
Next we will specify the working directory for our application in the container using the WORKDIR command and will copy the contents from the folder specified along with the COPY command. The last statement in the dockerfile will be ENTRYPOINT which will help to run the container as an executable. Here's the dockerfile instructions in full.
FROM microsoft/dotnet:1.0.0-rc2-core

WORKDIR /app
COPY /app /app

ENTRYPOINT dotnet docker-build.dll
Here's for ENTRYPOINT we have instructed Docker to execute the dotnet command to run the dll of our application.
Publishing the app in to Docker
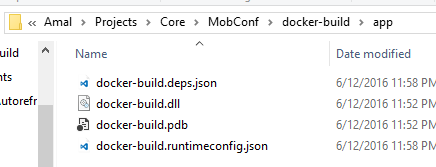
So in the dockerfile we have specified that our library is in app folder and we haven't one that yet in our project till now. Let's create that using the dotnet publish command as shown below.

In the command we have specified the directory where the outputs to be created by using the -o switch. The app directory will be created under our root directory of the project and it will have the following items after the command is executed.
We are all set up now for creating the image in the Docker and can do that by using the following command.
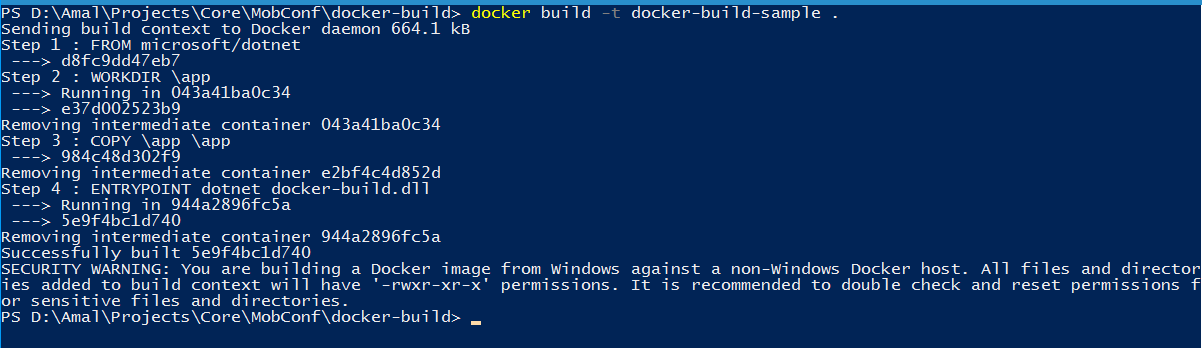
docker build -t <tagname> .
The above command will create the image with the tag name specified in the -t switch. The dot(.) indicates that the instructions are in the file named dockerfile in the current directory. If you have different name for the instruction file then you need to specify that in the command. The output of the build command will be as follows.
We can execute the docker images command to view the recently created image.

Executing the Image
To execute the image in a container, use the docker run command as shown below

So we have created and compiled a .NET Core project in a Windows machine, created a image in Docker using the dockerfile and executed it in a Linux shell. You won't have imagined a scenario like this couple of years ago. Times do change !!!!
No Comments
Connecting Azure Blob Storage account using Managed Identity
Posted 12/9/2022Securing Azure KeyVault connections using Managed Identity
Posted 11/26/2022Manage application settings with Azure KeyVault
Posted 11/9/2022Adding Serilog to Azure Functions created using .NET 5
Posted 4/3/2021Learn how to split log data into different tables using Serilog in ASP.NET Core
Posted 4/23/2020