Exposing Database using a WCF Restful Data Service
Last month I was preparing for a training session on Kendo UI using JavaScript which included some advanced topics using Kendo Grid. I was on the lookout for a sample service to show the CRUD operations in Kendo Grid and did find couple of services hosted by Telerik itself and by OData community. Since they were mainly read only services, I was unable to do any update or delete operations using the methods exposed by them. So I was thinking about creating a new service for my purpose and then I stumbled on this piece in MSDN which helped to save a lot of precious time that may be needed for creating a new one from the scratch.
I will be using the Northwind database for this purpose and if you don’t have a copy of the same with you, you can go here and download it. Once you are ready with database, we can proceed to create the service. Again I will be using the VS 2013 Community which is a subset of the Ultimate version and is offered free of cost by Microsoft.
Create New Project
From the File menu select WCF and then WCF Service Application, gave a name for the project and click Ok
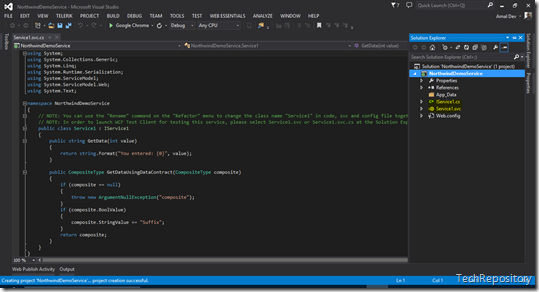
A new project will be created by Visual Studio with some default files. Remove the IService1.cs and Service1.svc files since we will be creating our service directly from the database models itself.
Define Data Model
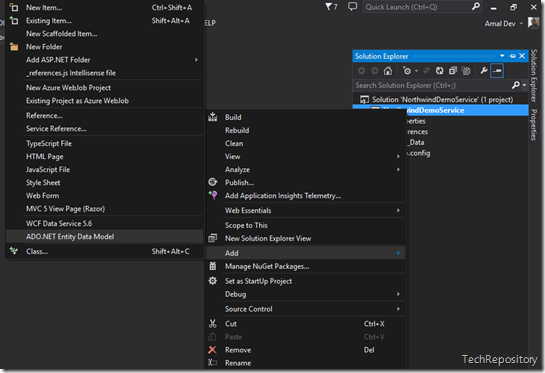
To create a data model, Right click on the project in the solution explorer and then select Add –> ADO.NET Entity Data Model
Then you will be asked to give a name for the model to be created and click on OK.
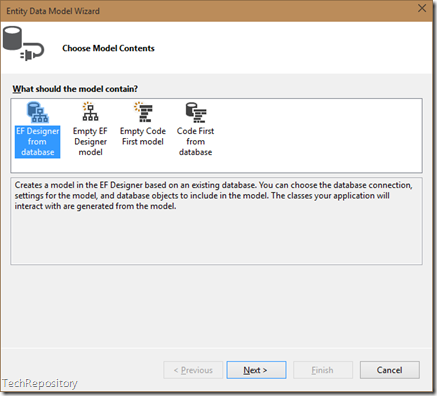
In the next window, select the EF Designer from Database option to generate the edmx file from the database and click Next
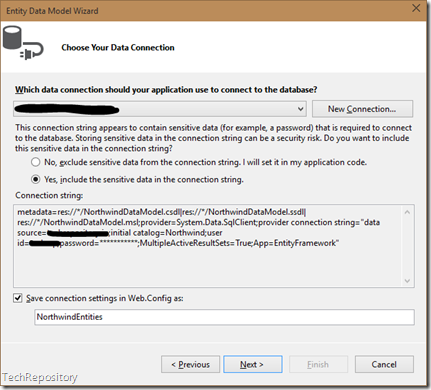
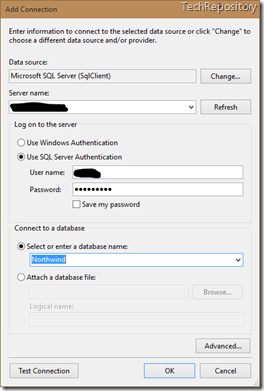
In the next window you will be asked to specify the data connection. If there are any existing connection then it will be pre-populated in the window or you have the option to add a new connection using the New Connection button. You need to enter the details for connecting to the database, here you can specify your database or the one hosted anywhere on the net. The window also has the provision to validate the connection. You need to enter the server name, user credentials and the database name.
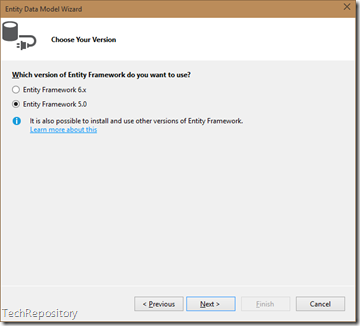
Click on the Next button to proceed and in the next window you will be asked to select the EF version. I will be proceeding with EF v5.0 since my hosting provider is not supporting EF v6.0 at the moment.
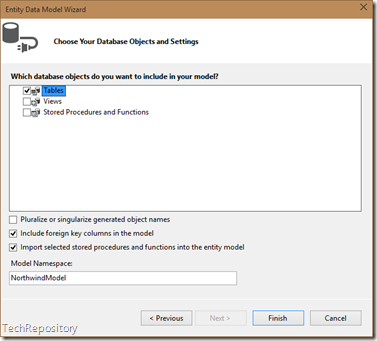
The next screen will refactor the database and will list all objects inside it. For us just select the Tables option and then uncheck the Pluralize or singularize generated object names check and click on Finish to generate the model.
Creating Data Service.
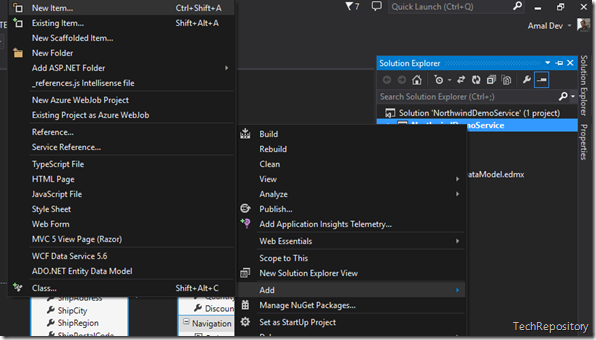
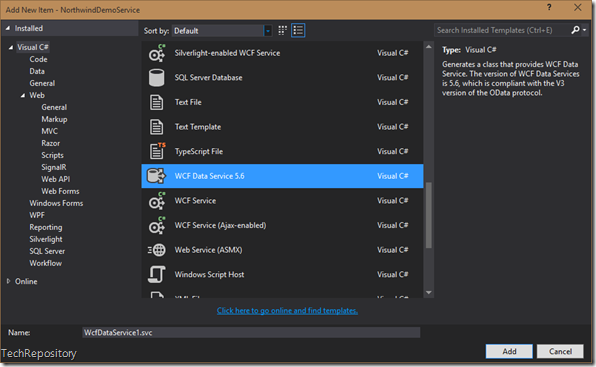
In this step we will be creating the data service which is going to interact with the model we just created. So in the Solutions Explorer, right click on the project and select Add –> New Item. Then in the New Item dialog, select the WCF Data Services item
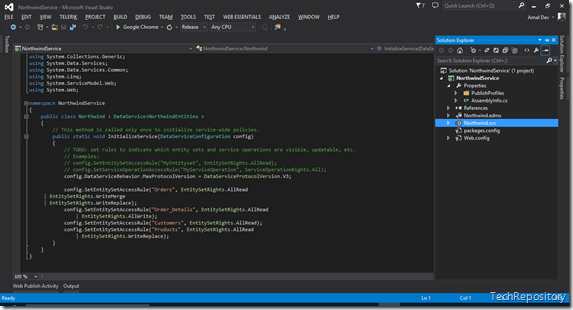
Visual Studio will create the service files for the new service with some code commented out which are needed for setting the permission. You need uncomment these lines and set the appropriate permissions for your methods
public static void InitializeService(DataServiceConfiguration config)
        {
            // TODO: set rules to indicate which entity sets and service operations are visible, updatable, etc.
            // Examples:
            // config.SetEntitySetAccessRule("MyEntityset", EntitySetRights.AllRead);
            // config.SetServiceOperationAccessRule("MyServiceOperation", ServiceOperationRights.All);
            config.DataServiceBehavior.MaxProtocolVersion = DataServiceProtocolVersion.V3;

            config.SetEntitySetAccessRule("Orders", EntitySetRights.AllRead
     | EntitySetRights.WriteMerge
     | EntitySetRights.WriteReplace);
            config.SetEntitySetAccessRule("Order_Details", EntitySetRights.AllRead
                | EntitySetRights.AllWrite);
            config.SetEntitySetAccessRule("Customers", EntitySetRights.AllRead);
            config.SetEntitySetAccessRule("Products", EntitySetRights.AllRead
                | EntitySetRights.WriteReplace);
        }
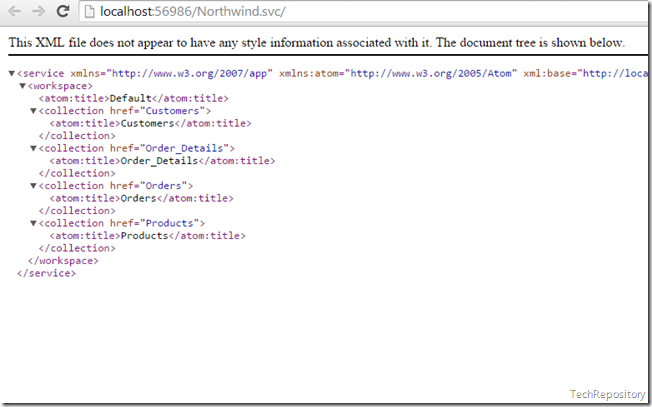
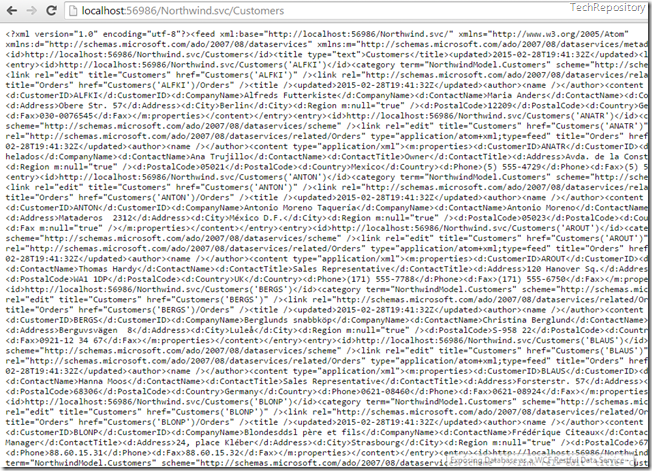
That’s all we need to set up the service. Run F5 to view the service in the browser.
That’s all I have for this post, till then happy coding :)
No Comments
Connecting Azure Blob Storage account using Managed Identity
Posted 12/9/2022Securing Azure KeyVault connections using Managed Identity
Posted 11/26/2022Manage application settings with Azure KeyVault
Posted 11/9/2022Adding Serilog to Azure Functions created using .NET 5
Posted 4/3/2021Learn how to split log data into different tables using Serilog in ASP.NET Core
Posted 4/23/2020

