Writing logs to different files using Serilog in ASP.NET Core Web Application
Application log files play an important role in analyzing the bugs and for troubleshooting issues in an application. It’s worth noting that the log files are also used for writing information about events and other information that occurs when the application is running or serving requests in the case of a web application. Most application developers use a single file to log everything from errors, warnings, debug information, etc. There is no harm in following this approach, but the downside is that it will be harder for you to segregate information from the file easily. We can easily overcome this by maintaining multiple log files depending on the need. In this post, I am going to show how we can achieve this with Serilog
Serilog is a popular third party diagnostic logging library for .NET applications, I have already written some post about it and it’s usage already. If you are new to Serilog, please refer to those posts using the links given below.
- Implementing Logging in a .NET Core Web Application using Serilog
- Rollover log files automatically in an ASP.NET Core Web Application using Serilog
- Write your logs into database in an ASP.NET Core application using Serilog
Code snippets in this post are based on .NET Core 5.0 Preview 5
Step 1 : Create a Web Application in .NET Core
Create a new ASP.NET Core MVC application using the below command
dotnet new mvc --name MultiLogFileSample
You can also do this from Visual Studio by going into File -> New Project -> ASP .NET Core Web Application
When the command is executed it will scaffold a new application using the MVC structure and then restores the necessary packages needed for the default template.
By default, it will create two json files named, appsettings.json and appsettings.development.json. These are the configuration files for the application and are chosen based on the environment where your application is running. These files will have a default configuration as shown below basically sets the default level for logging.
{
  "Logging":{
    "LogLevel":{
      "Default":Information",
      "Microsoft":Warning",
      "Microsoft.Hosting.Lifetime":Information"
    }
  }
}
By default, it is set as Information, which writes a lot of data to the logs. This setting is very useful while we are developing the application, but we should set it higher severity levels when the application is deployed to higher environments. Since Serilog is not going to reference this section, we can safely remove this from the configuration files
Step 2: Adding Serilog
To integrate Serilog with our application, we will need to add the following packages
- Serilog.AspNetCore - Base package dedicated for ASP .NET Core integration
- Serilog.Settings.Configuration - Provider that reads from the Configuration object
- Serilog.Filters.Expressions - Used for expression-based event filtering
- Serilog.Sinks.File - Used for writing logs in to one or more files
To add the packages into your projects, execute the commands given below from the command prompt
dotnet add package Serilog.AspNetCore
dotnet add package Serilog.Settings.Configuration
dotnet add package Serilog.Filters.Expressions
dotnet add package Serilog.Filters.File
To do this from Visual Studio, go to Manage NuGet Packages and then add the packages from there
Step 3: Added Serilog settings in the configuration file
Now we will modify our appsettings.json file to add the settings for Serilog. In one of the earlier step, we removed the default entries for logging and will add the following instead of that
"Serilog": {
    "MinimumLevel": {
      "Default": "Debug",
      "Override": {
        "Default": "Information",
        "Microsoft": "Warning",
        "Microsoft.Hosting.Lifetime": "Information"
      }
    },
    "WriteTo": [
      {
        "Name": "Logger",
        "Args": {
          "configureLogger": {
            "Filter": [
              {
                "Name": "ByIncludingOnly",
                "Args": {
                  "expression": "(@Level = 'Error' or @Level = 'Fatal' or @Level = 'Warning')"
                }
              }
            ],
            "WriteTo": [
              {
                "Name": "File",
                "Args": {
                  "path": "Logs/ex_.log",
                  "outputTemplate": "{Timestamp:o} [{Level:u3}] ({SourceContext}) {Message}{NewLine}{Exception}",
                  "rollingInterval": "Day",
                  "retainedFileCountLimit": 7
                }
              }
            ]
          }
        }
      },
      {
        "Name": "Logger",
        "Args": {
          "configureLogger": {
            "Filter": [
              {
                "Name": "ByIncludingOnly",
                "Args": {
                  "expression": "(@Level = 'Information' or @Level = 'Debug')"
                }
              }
            ],
            "WriteTo": [
              {
                "Name": "File",
                "Args": {
                  "path": "Logs/cp_.log",
                  "outputTemplate": "{Timestamp:o} [{Level:u3}] ({SourceContext}) {Message}{NewLine}{Exception}",
                  "rollingInterval": "Day",
                  "retainedFileCountLimit": 7
                }
              }
            ]
          }
        }
      }
    ],
    "Enrich": [
      "FromLogContext",
      "WithMachineName"
    ],
    "Properties": {
      "Application": "MultipleLogFilesSample"
    }
  }
Here we have configured entries for writing logs into two files depending upon the severity. For the first one, we set up the filter like this
"configureLogger": {
    "Filter": [
        {
        "Name": "ByIncludingOnly",
        "Args": {
            "expression": "(@Level = 'Error' or @Level = 'Fatal' or @Level = 'Warning')"
        }
        }
    ],
Because of this condition, only Error, Fatal and Warning types of logs will be written into a file named ex-*.log. Since we have configured it as a rolling file, the date will also get appended to the file name. Similarly, for the second one, it will write into the file named cp-*.log if and only if the level is Debug or Information’
Step 4: Integrate Serilog in the application
To configure Serilog in our application, we will modify our Program.cs file to call the Serilog middleware as shown below
public static IHostBuilder CreateHostBuilder(string[] args)=>
    Host.CreateDefaultBuilder(args)
        .ConfigureWebHostDefaults(webBuilder =>
        {
            webBuilder.UseStartup<Startup>();
        })
        .UseSerilog((hostingContext, loggerConfig) =>
            loggerConfig.ReadFrom.Configuration(hostingContext.Configuration)
        );
Step 5: Writing logs from the application
Let’s modify the Index method in the HomeController.cs file to simulate the call to logger methods which in turns writes information to the files
public HomeController(ILogger<HomeController> logger)
{
    _logger = logger;
    _logger.LogInformation(Writing to log file with INFORMATION severity level.");
    _logger.LogDebug(Writing to log file with DEBUG severity level.");
    _logger.LogWarning(Writing to log file with WARNING severity level.");
    _logger.LogError(Writing to log file with ERROR severity level.");
    _logger.LogCritical(Writing to log file with CRITICAL severity level.");

}
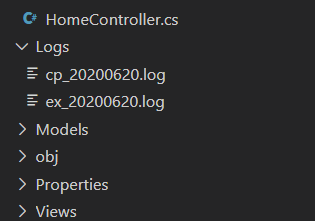
If you run the application now, you will see the information in written into different files based on the log levels
cp-*.log
2020-06-20T23:11:42.0922074+05:30 [INF] (MultipleLogFilesSample.Controllers.HomeController) This is a log with INFORMATION severity level.
2020-06-20T23:11:42.0934669+05:30 [DBG] (MultipleLogFilesSample.Controllers.HomeController) This is a log with DEBUG severity level.
ex-*.log
2020-06-20T23:11:42.0934979+05:30 [WRN] (MultipleLogFilesSample.Controllers.HomeController) This is a log with WARNING severity level.
2020-06-20T23:11:42.0950269+05:30 [ERR] (MultipleLogFilesSample.Controllers.HomeController) This is a log with ERROR severity level.
2020-06-20T23:11:42.0958420+05:30 [FTL] (MultipleLogFilesSample.Controllers.HomeController) This is a log with CRITICAL severity level.
No Comments
Connecting Azure Blob Storage account using Managed Identity
Posted 12/9/2022Securing Azure KeyVault connections using Managed Identity
Posted 11/26/2022Manage application settings with Azure KeyVault
Posted 11/9/2022Adding Serilog to Azure Functions created using .NET 5
Posted 4/3/2021Learn how to split log data into different tables using Serilog in ASP.NET Core
Posted 4/23/2020