Memory dumps of a developer
Articles and tutorials on .NET Core, ASP.NET MVC, Kendo UI, Windows 10, Windows Mobile, Orchard
Visual Studio Team Services : Creating Build Definitions
In the one of the earlier post in the blog, I have showed you how to host your project in Visual Studio Team Services. In this post, I am going to show the steps needed for creating a build definition in Team Services so that whenever we checks in the changes it will trigger the build process automatically.
Creating Building Definition
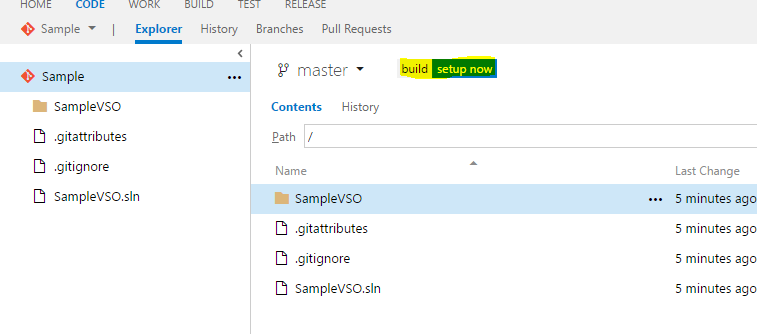
You can create a new build definition from either the dashboad or from Build page or from the Code page. In the code page it will show a link to set up the build process along side the name of the branch if it's not setup as shown in the image below.
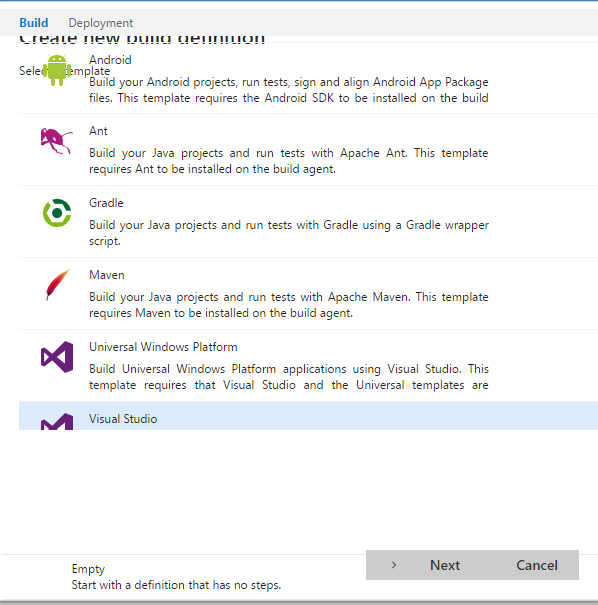
When you click on the setup now, a dialog box will be shown containing the list of build templates available in Team Services. Select the Visual Studio template from the list and click on the next button.
Visual Studio Team Services : Hosting Your First Project Using Git From Visual Studio
Visual Studio Team Services is the new name for Visual Studio Online which was a collection of all the online services of Visual Studio. But the name "Visual Studio Online" was very confusing, many people thought that it's a web version of Visual Studio. So they decided to rename it as "Visual Studio Team Services" bringing along some new features with it too. You can read more about setting up Visual Studio Team Services Account, its features and pricing from here.
In this post, I am going to show you how to host a repository in Visual Studio Team Services, store and collaborate code from Visual Studio.
Creating Project
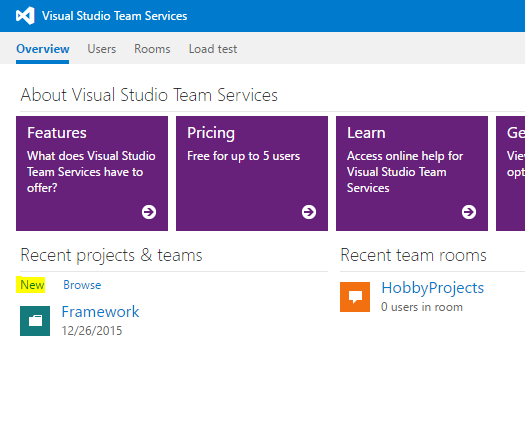
Let's start by creating a new project from the Team Services Dashboard by clicking on the New link.
Give a name and description for the project in the modal window, select Git for version control and process template as Agile and click on the Create New Project button.
Visual Studio Tips & Tricks - Window Layouts
Another neat little feature available in Visual Studio is the option to customize the window layouts. This comes in handy when you work on different machines and you want the same look and feel for the enviroment across all your devices and instances.
For this to work, first you need to log in with the Microsoft account while using Visual Studio, so that whatever changes you make for customizing the layout will get stored in the cloud and will be used to synchronize the layout across devices.
Let's see how we can manage layouts using Visual Studio. I prefer to have least tabs open in the IDE and likes have the code editor uses most of the layout. So I have closed all the open tabs in the right side as well as in the bottom.
Saving Layout
Now we can save out layout from Window -> Save Window Layout.

Enabling Search in your Blog Posts in Orchard
One of the pain point faced by lot of developers/bloggers migrating to Orchard CMS platform is the process of enabling the search feature. In Orchard the search feature is disabled by default. So even if the search box is visible in the site, when you try to search the site/blog contents, it will return an error saying, "Please define a default search index". If you this error, then you can confirm that the it's not enabled and if you gets error message like "No results found" even if there exists content for the search criteria, you can confirm that the search is enabled, but index is not properly rebuilt after enabling the search.
In this post, I am going to show you how to enable the search functionality and to make sure that the contents are listed while searching.
To enable searching, you need to make sure that the following modules are enabled.
- Search - enables you to search the index using keywords on Lucene query syntax and returns list of matching items
- Index - creates an index on the items in the blog/site
- Lucene -Implements the searching by using the index we have created
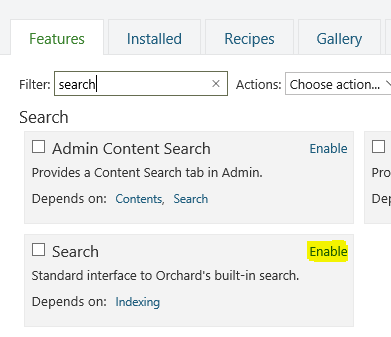
To enable it, go to Modules and search in the Filter box in the Features tab as shown below. If the module is installed then it will show there, otherwise you need to install it first. Clicking on the Enable link to make it available in the site.
Enabling Search Box in the UI in Orchard Blog Module
When you setup the blog module in Orchard CMS, you will be wondering why there is no search box coming in the home page of your blog. That's because search is disabled by default in Orchard and in this post I will guide you through the process of enabling it in the UI.
First and foremost, you need to make sure that the Search module is enabled or not. If the module is enabled, then it will list in the left menu in Admin dashboard under Settings as shown below.
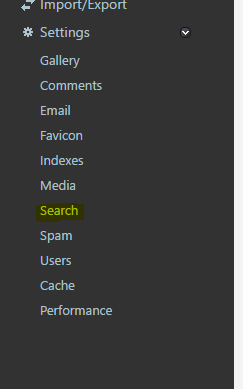
If it's not, then you need to enable it from the Modules section. Search for the module by typing search in the filter box and click on the Enable link to enable it. Once it's enabled, then in the Settings menu the link will be displayed.
Using HtmlAgility Pack to Extract Contents in a Web Page
Recently I was working on a hobby project and in that I wanted to extract all the <image> tags from a web page. There are lot of solutions available for parsing the HTML page by using regex or by using various string manipulation methods. But I was looking for a neat solution and stumbled upon the HtmlAgility Pack. It's a .NET library that allows us to parse HTML files and outputs a sturcture similar to the DOM.
It's been available for sometime now and is hosted at Codeplex and is available as a NuGet package. To install it in your solution, you can either use the NuGet package manager UI or the console. To install it from the console, run the following command
Install-Package Htmlagilitypack
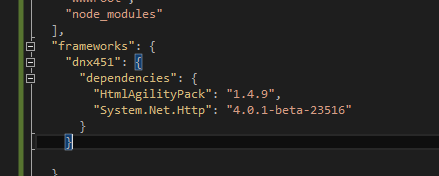
Once the installation is completed, it will be added under the dependencies in project.json as well in References.

Installing packages using Bower From Visual Studio
In one of the earlier post, I have explained the procedure for installing Bower in your Windows machine using command line tools. Now, it's possible to install packages using Bower from Visual Studio too, if you are wondering what actually Bower is then please go through this post which I have published earlier.
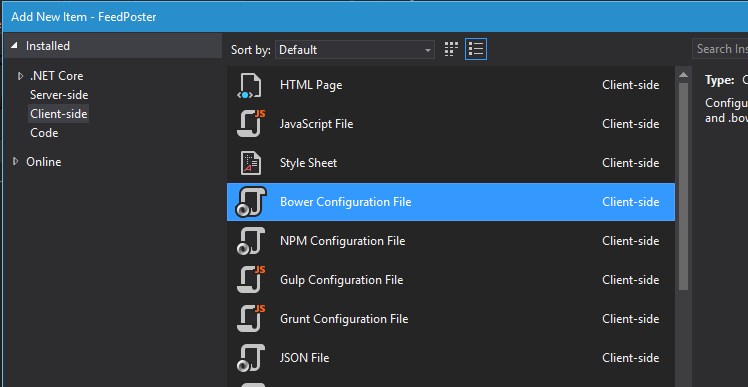
The first step in installing the package is to create the Bower Configuration File which will be used to save all the information about dependencies and metadata like name of the project, description entry point.
To create the configuration file, select the Bower Configuration File option from the Add New Item dialog box which can be brought up from the context menu by right clicking on the project.
I have saved the file as bower.json and if you open it now, the contents will be,
Visual Studio Tips & Tricks - Quick Actions
In the previous versions of Visual Studio we have refactoring options such Encapsulate Field, Extract Method etc in the context menu and the Resolve option for adding namespaces when you refer a method which are not imported etc. In VS 2015, these all are clubbed together and will appear in once place called Quick Actions. They also added new features like previewing and integreated search into it making it more productive. Also in statements wherever the quick actions are available, a Light Bulb will be shown in the left side very much like the feature in tools like Reshaper.
To see this in action, let's call a new method which is not defined in the code. The light bulb will immediately appear along with the red squiggly once you complete the statement as shown below.
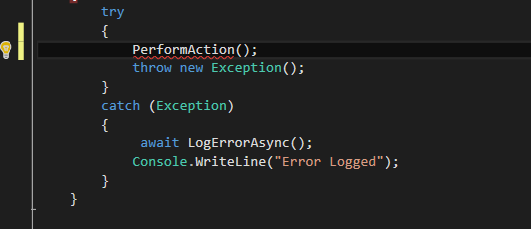
You can click on the bulb to bring up the suggested action, which is to generate the method stub for PerformAction. If we click on the arrow button, you will get a preview of the content of the method that is going to be generated. This feature is newly added in Visual Studio 2015, earlier we had only the option to generated the method
Visual Studio Tips & Tricks - Performance Analysis
In this post, I am going to introduce a new feature made it's debut in Visual Studio 2015, the diagnostic tools, which I will definitley help you to easily identify performance bottlenecks and issuees while developing apps using the most widely used IDE.
One new feature you are going to easily notify is that whenever you debug code in Visual Studio 2015, it will show the time eapsed right next to it as shown in the image below.
Time Values while debbugging
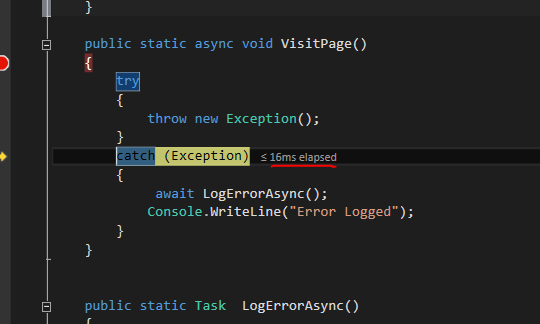
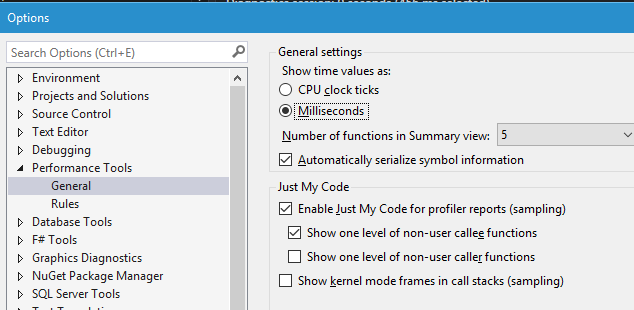
You can configure the type of information that needs to be shown from the options. You have the option to set either CPU clock ticks or Miliseconds. By default it's miliseconds.
Opening Diagnostic tools
If you hover your mouse over the time value, it will show you a popup like the one below.
Visual Studio Tips & Tricks - Error List Window
In this post, I am going to give you some tips for the Error List window is Visual Studio , which I hope will help you to increase the productivity while using the most widely used IDE.
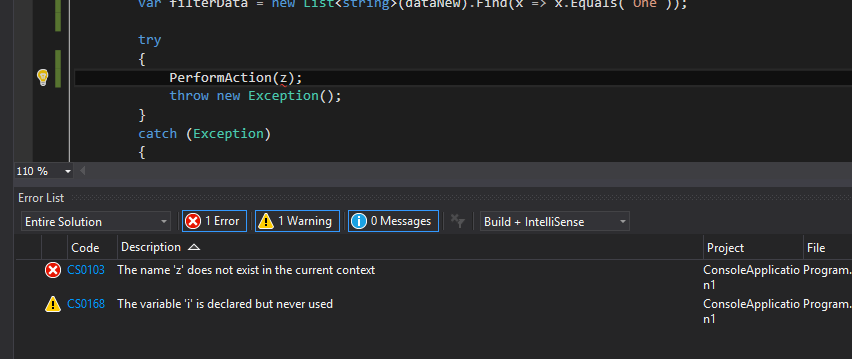
The error list will show the application error and warnings with code starting with "CSXXXX" where as the errors from code analysis will start with "CAXXX". Also you have the option to filter out error, warning, messages by clicking on the button in the top bar in the window. Those three buttons will act as toggle buttons and based on its state it will filter the list.
Errors, Warnings and Messages
Filtering Errors by Document
Connecting Azure Blob Storage account using Managed Identity
Posted 12/9/2022Securing Azure KeyVault connections using Managed Identity
Posted 11/26/2022Manage application settings with Azure KeyVault
Posted 11/9/2022Adding Serilog to Azure Functions created using .NET 5
Posted 4/3/2021Learn how to split log data into different tables using Serilog in ASP.NET Core
Posted 4/23/2020